Sign In / Sign Up To Add Wishlist
Wishlist is available for members only. Please sign in or sign up to add your wishlist.
Setting Up Printing from PLC with Brother Label Printers
This guide provides an overview of how to set up printing from a Programmable Logic Controller (PLC) using Brother label printers. Brother supports printing via PLCs using P-touch Template command, which allows variable data to be inserted into pre-defined templates stored on the label printer.
Disclaimer: This page explanation is applicable only for PT series, QL series, TD-2 series, TD-4D series.
Table of Contents:
- What Brother Provides
- Steps to Set Up Printing from PLC
- Briefing on How to try the Sample Program (Ethernet)
- Summary
What Brother Provides
Brother offers various resources to integrate their label printers with Mitsubishi Electric PLCs, including:
- A sample ladder program for PLC communication with Brother label printers.
- A manual that explains integration steps using serial or Ethernet connections.
- Sample templates that can be used with the Brother PT series, QL series, TD-2 series and TD-4D series label printers.
These resources enable the users to configure printing through PLC by using P-touch Template commands, allowing the replacement of variable data within the templates saved on the label printer.
Steps to Set Up Printing from PLC
Step 1: Template Creation and Transfer
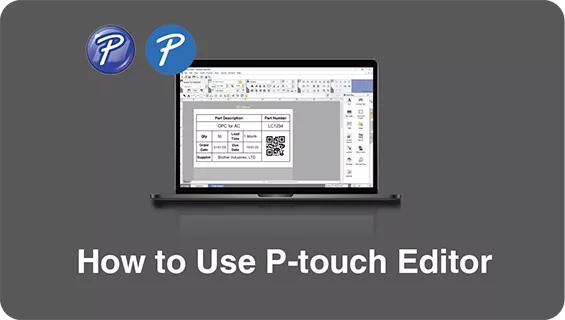
Create Label Templates: Use P-touch Editor to design the label templates.
Transfer Templates to the Label Printer: Use P-touch Transfer Manager to transfer the templates to the label printer.
Assign the Template Numbers: Each template should be assigned with a specific template number within the label printer.
Step 2. PLC Programming
Develop a PLC Program: Using GX Works3, develop a PLC program that triggers the P-touch Template commands when specific conditions are met.
Use Sample Program: Brother provides a sample ladder program as a reference, which includes commands for sending the variable data to the label printer and initiating printing.
Step 3. Communication Setup
Serial Connections: Set up RS-232C communication settings on both the PLC and label printer.
Ethernet Connections: Ensure proper IP configuration for both the PLC and label printer.
Step 4. Testing and Troubleshooting
Test the Setup: Trigger the PLC program and ensure that the label printer correctly prints the labels with the dynamic data.
Refer to Manual: The manual provided by Brother contains troubleshooting tips in case of issues occur during testing.
Briefing on How to Try the Sample Program (Ethernet)
Brother provides a detailed sample program for setting up the printing via Ethernet connections with Mitsubishi Electric PLCs.
Prerequisites
- PLC Programming Knowledge: Users must have experience with Mitsubishi Electric PLC programming, especially in the ladder programming, Structured Text (ST), and Function Block (FB) languages.
- Software: Familiarity with the GX Works3 development tool is required.
Downloading and Configuring the Sample Program
1. Download Necessary Software:
Install the label printer driver, P-touch Editor and the Printer Setting Tool from
https://www.brother.co.th/en/support
2. Download Sample Program:
Download the PLC sample program here
3. Configure Sample Template:
Open "brother-labelprinter-ptdt" -> "1. Program" -> "SampleTemplate", open a template on the label printer with P-touch Editor.
PT-9 series: auto_PT-900.lbx
TD-2 series: auto_TD-2130.lbx
TD-4D series: auto_TD-4D.lbx
QL-8 series: auto_TD-2130.lbx
Adjust the layout as needed, select your specific Brother label printer model and save the updated template
4. Template Transfer:
Send the template to the label printer with P-touch Editor and ensure that the key assignment matches with the template number referenced in the PLC program.


.webp?rev=6f7fe6dc18044a90852e7a6a2be144f1&hash=9FB13AB59335871458F4DEDB10F18B2A)
.webp?rev=327cea9c8e6a406e87537f0fbe05fbb6&hash=600B1F2BD5D4F4490B533DA9DE23B96A)
5. Configure PLC Program:
Load the sample program into GX Works3.
Adjust the CPU parameters and register the module labels for Ethernet communication.
6. Additional Configuration Steps:
Disable the WiFi on the label printer to prevent connection conflicts.
Set the Label Printer IP Address as shown in the manual for Ethernet connections.


7. Run and Test:
Execute the PLC program by turning the main switch to "Run". Trigger the conditions to send the P-touch Template Command to the Brother label printer. Verify that the label printer correctly prints the labels with dynamic data from the PLC.
Summary
Setting up the printing from a PLC using Brother label printers involves creating the templates, programming the PLC to send the P-touch Template Commands, and configuring the communication between the PLC and the label printer.
Brother provides comprehensive resources, including sample programs and manuals, to guide users through this process. By following these steps, production environments can streamline their labelling processes and ensure accurate label creation based on dynamic data from the PLC.
Explore More